


There is no better way to treat yourself than getting a gel manicure. This nail enhancement technique offers the strength of acrylic paints and a natural look as well. In case you are going to get gel nails, the first thing you will need is proper instructions. If you are looking for anything like that, then you have come to the right place.
In this article, you will get the complete guide on how to do gel nails at home.
Everything About Gel Nails:

This manicure is basically a gel based nail polish technique. To cure and seal the polish, you have to use a UV lamp. The gel nails are durable and long lasting than many other regular polishes. Again, the gel nails stay chip free for more than 2 weeks.
Supplies you need to do gel nails:
Before moving ahead on how to do gel nails, gather the supplies you will need during the process. Such as:
- Nail lamp
- 100% acetone
- Nail polish soak off clips
- Cotton pads
- Nail file
- Cuticle remover liquid
- Nail buffer
- Rubbing alcohol
- Nail clipper
- Gel nail polish
- Steel cuticle remover and cutter
- Cuticle clippers
- Basecoat, topcoat, and ph bond
With these gel nail kits, you can both apply and remove the polish. You have the freedom to add or remove any supply from the list and use an alternative.
How to do UV gel nails
From the headings, you must have guessed which technique I am going to discuss. Here is a step by step instructions to get your gel nails done at home.

1. To get an ultimate look from the gel nails, start the process with blank nails. So before getting into the main process, wipe off any polish leftovers you already have on your nails. Here is the best way to do that:
- Buff the top layer of the polish with a nail buffing block.
- Soak the cotton balls into acetone.
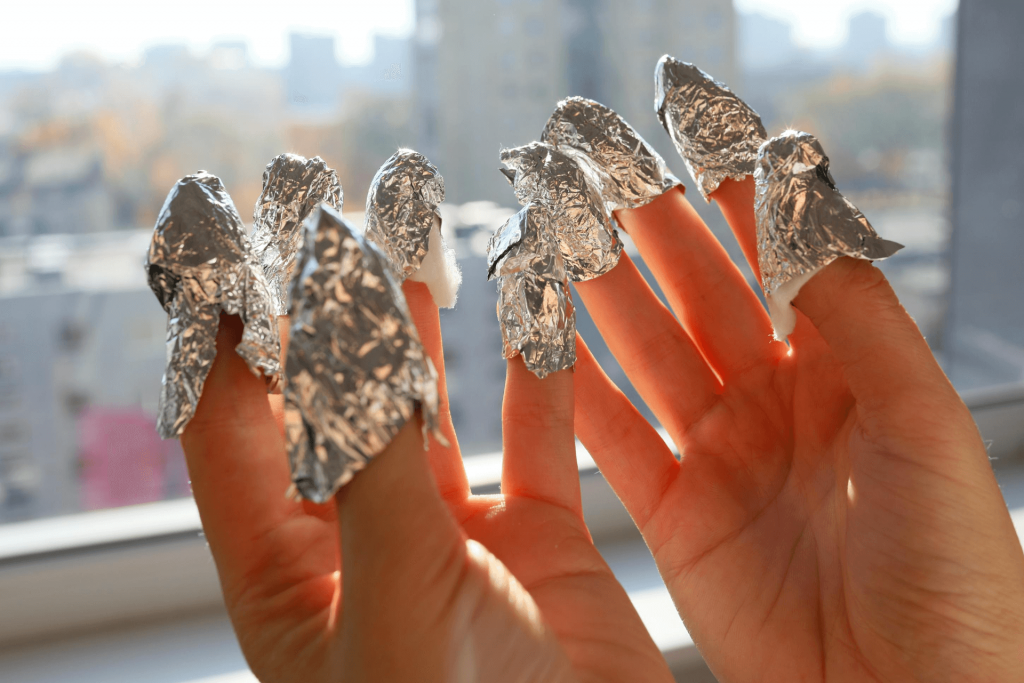
- Cover your fingernails with those balls and wear the nail polish soak off clips on each of your fingers. These clips do not allow the cotton balls to move from your nails. If you do not find soak off clips, use aluminum foils.
- Wait in that position for 15 to 20 minutes.
2. After taking off the clips, scrape off the residue with a cuticle remover. The previous polish should be lifting off by now. If you find difficulties to remove the nail paint with a scraper, use more acetone soaked cotton pads to wipe off the leftovers.
3. Now it is time to shape your nails. Start with cutting the nails at your desired shape and file the tip of each nail with a filer. Finally, give the nails whatever form you want. You can make them round, square, pointy, oval, or almond-shaped using a nail buffer block.
Buffing the top layer will make the gel polish to adhere to the nails better.
4. Once you have done shaping your nails, focus on your cuticles. You need to do four things in this step.
- Rub cuticle remover liquids on your cuticles.
- Push down your cuticles using the steel cuticle remover.
- Cut off the cuticles from each nails using the cuticle clippers.
- If there is any oil or debris left, wipe them off with acetone soaked cotton balls.
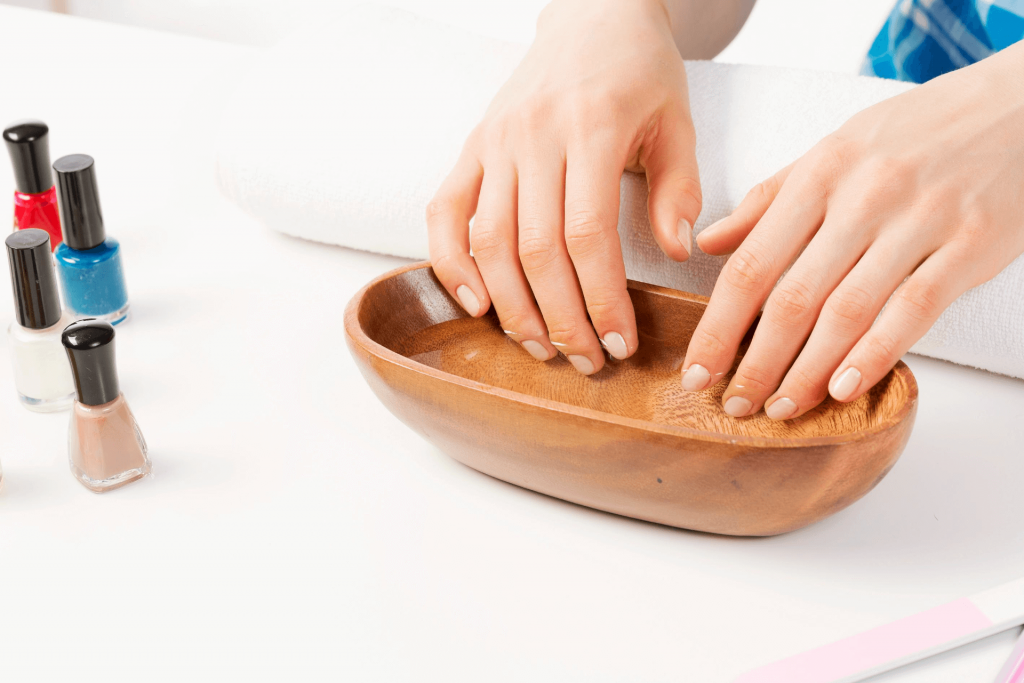
5. Wash your hands with distilled water to remove all the dead cells. Make sure your nails are clean and ready for a gel manicure.
6. To make the polish long lasting and attractive, you need to wear a basecoat on each nail. The base should be extremely thin comparing to the standard polish layer. You have to be extra careful while applying the coating and ensuring the gel does not get on your skin. Let the base dry under a light for a minimum of 120 seconds.
7. The basic concept of doing gel nails is to apply one layer, dry, and repeat. So, after drying the base coat, go for the get colors. You have to keep the coatings as thin as possible.
The first layer can look a bit streaky, but that is not a problem. Paint throughout your nails, and do not miss any spot. Dry the polish under UV lamp for 2 to 3 minutes, and then apply another layer.
8. You are almost done with your gel manicure. Apply the top coat of the gel on your nails. Again you have to place your fingers under the UV lamp for drying.
9. Once the gel gets dried, you are done with the manicure. But like the salon, you must give your nails the finishing touch. Some gel polish may leave a sticky layer on the nails. To remove those tacky layers, wipe off your nails using acetone soaked cotton pads.
To remove gels from the skin, repeat the same technique. If your nails look dull after a few days, smooth out the top polish layer with a nail buffer. And then reapply the top coating.
How to do gel nails without UV light
I have already discussed the most appreciated technique to do gel nails. If you are searching for how to do gel nails without a UV, then I have other alternatives for you. But just to be clear, these methods may not be much efficient and will take you a long time to cure the polish.
Top 3 gel nail methods without using a UV light:
- Ice bath method
- Use a dry spray
- Cure the polish under the sun
Does gel manicure harm your skin?
Usually, people think gel nails are dangerous because of the UV light. But that is not true. This manicure process is not harmful as long as you are doing it correctly. However, the removal process can be a bit painful than other nail enhancement techniques.
Now you know how to do gel nails at home. Do not expect much if you are doing it for the first time. The perfect polish will take time and practice.
Related: How To Whiten Nails At Home: 4 Techniques You Need To Know Today


