


Are you looking for those trendy nail arts going on all over the Instagram? Yes, I am talking about the gradient nail arts or Ombre nails as they define it. Even though the trend started with the color transition of white and pink, now you can try any colors you want.
To be honest, I decided to try myself when I first saw these ombre nail arts. The exciting part is, I have found doing ombre nails extremely easy. If you are wondering how to do ombre nails, well, worry no more.
This article will guide you to bring your creative ombre manicure to reality. You will get all the tips and tricks on ombre nails. At the end of this guide, you will master this French nail art.
Things You Will Need to do Ombre Nails
Before starting to do ombre nails, gather all the materials you will need. It is frustrating to look for any important kit when you are in the middle of nail painting. Also, quick tours can take away your concentration and mess with your creative nail polishing.
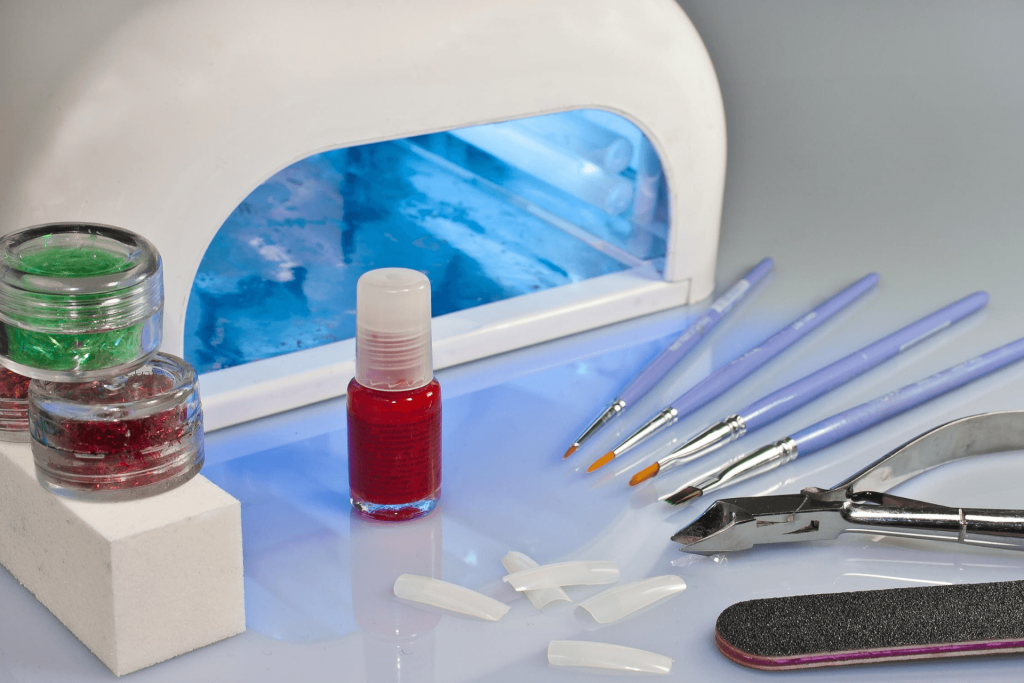
The kits you will need:
🔸 Different color nail polishes (2 or 3 – depends on how many gradients you want)
🔸 Different shades of same nail polish ( light to dark – this will make your experiment easier)
🔸 An unused sponge (You can use the bathroom sponge)
🔸 Q tips or Toothpick
🔸 Nail polish remover
🔸 A plastic sheet
🔸 Scissors
🔸 Tape
🔸 Clean up brush
Now let’s roll on to the basics of how to do ombre nails.
How To Do Ombre Nails With Sponge
You can do ombre paints by just following the steps given below:
1. Trimming and cleaning
Before wearing new nail polish, remove any paints that you have put before. To clean up your nails, use small cotton balls soaked in nail polish remover. Gently rub the cotton on each fingernail to wipe off the nail paint.
After cleaning up the nails, trim them off at your desired length. You can use a nail clipper for trimming. To smoothen the rough edges and give the nails a proper shape, use a nail filer.
2. Wear a clear base color
To make the ombre art more vibrant, paint your nails with a thin water colored polish. The base coating offers two significant advantages. Such as:
🔸 It protects the fingernails from getting stained by the color paints.
🔸 Your manicure quality gets better as the base coat decreases the prevalence of chips in the nail polish.
This step is optional. But many experts suggest including this in the ombre nail technique.
3. Apply a base coating
The base coating refers to the lightest color you want to put on your nails. Most people prefer applying white color as the base because some colors get a better blend with it. Also, nail art will look more vibrant when you use a white coating.
You can also use the lightest color of your planned ombre polish. This type of base coating offers a more subtle and softer gradient. After choosing the base polish, paint all your fingernails with it.
If you want an opaque base, paint the same coating twice. Let the first coating dry before applying another one. Also, do not make the base heavy or thick.
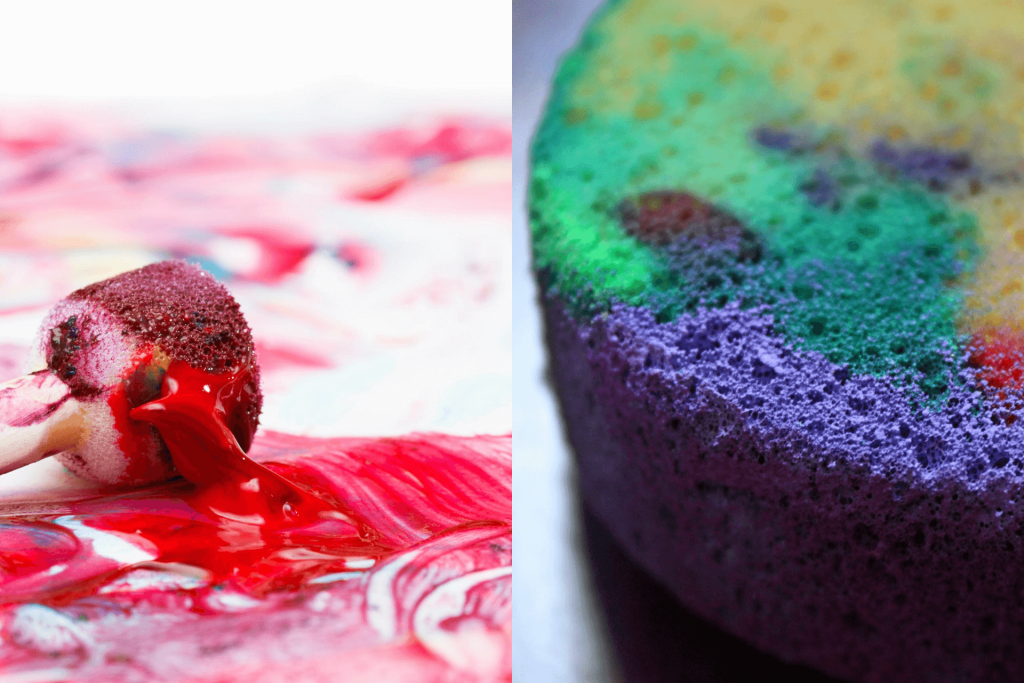
4. Paint the plastic sheet or your sponge
You know there are different ways to do ombre nails. For this step, you have two different paths. I will explain one by one.
To apply the colors on the sponge, cut that in a proper shape first. Then soak in water and wring out the sponge until 80% of the water is removed. Many of you may ask why I am suggesting to do it?
Well, soaking the sponge with water actually has some benefits. It prevents the sponge from absorbing the nail polish. Also, the colors do not dry quickly.
Now it is time to put ombre nail paints on the sponge. You have to paint the color in a straight and horizontal way, keeping the lines side-by-side. You can choose multiple colors for your ombre nails. While painting the sponge, apply the lightest color first. Then, go for the darker one and make sure the darkest color is underneath the previous polish.
You can experiment with the colors on several sponges before selecting the final one. Another thing, the width of the lines must cover your whole nail. Also, there must be no sponge exposed between two lines.
The plastic sheet is basically used for the color experiment. You can pour a generous amount of nail polish right next to each other. Swirl the colors at their edges with a toothpick. The mixing area will decide the graduation length. After that, dab your water-soaked sponge in the nail polish.
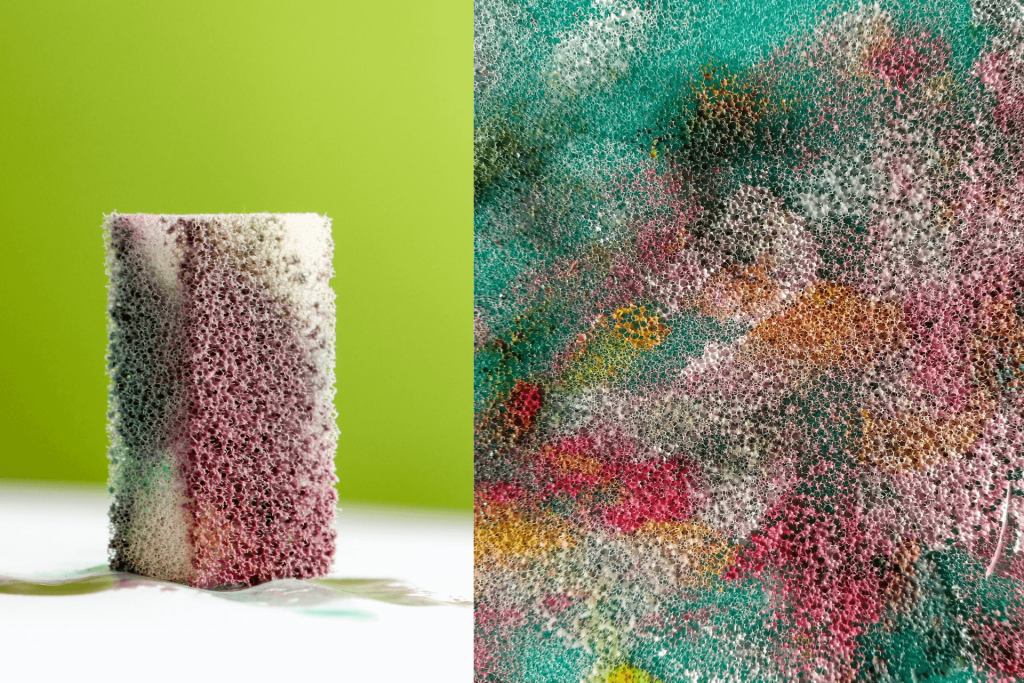
5. Dab the sponge on your nails
Do not lose patience. You have almost mastered the techniques on how to do ombre nails, just a few steps more.
After applying nail paints on the sponge, stamp it on the nail. Press the sponge by its side and press it on the top of your nail. Keep doing it for a couple of times. Each time, after dabbing, lift the sponge and check if the colors are pasting the right way or not.
Now, roll the nail polish slowly with the side edge of your sponge. This will help you to get a better color blend.
6. Reload!!!
You have put a beautiful ombre effect on your nail. Now it’s time to reload the sponge so that you can paint your other fingernails. If you kill much time between painting two nails, the sponge will get dry.
Apply paint on the sponge following the 4th step.
7. Add a top coating
Once you have finished giving ombre effects to all the nails, dry them for 15 to 20 minutes. To make the nails look more shiny and smooth, add a clear top coating.
8. Wrap up everything
Congratulations. You have successfully finished painting french ombre nails. If there is any paint on your skin, carefully clean it with a nail polish remover. Use a q-tip, cotton, or paintbrush to rub the color off your skin.
All finished!
Now you know how to do ombre nails at home with your own polish kits. So stop waiting and try this trendy nail art today.


