


Recently the acrylic nails have become the face of trendy nails. I am sure you will fall in love with this hardy and fashionable manicure if you see them once. But come on, visiting the salon every time you need an acrylic polish is a bit expensive and time-consuming.
The best thing will happen if you can do them at your home. And guess what? You can enjoy this manicure at home with proper kits. In this article, you will get to know how to do your own acrylic nails in the easiest way possible.

Necessary Acrylic Nail Kits
Before getting into the tutorial on how to do your own acrylic nails, let’s talk about the supplies you need.
If you want the smooth finished nail polish, you must gather your acrylic nail kits correctly. Imagine, you are done with the base coat but can not find the primer. It will divert your focus, right? And that is why I always emphasize on collecting the supplies first.
So, what will you need to get professional-looking acrylic nails? Here is a list you can follow:
🔹 Acrylic nail tips
🔹 Nail glues
🔹 Nail clippers
🔹 Nail filers
🔹 Buffing blocks
🔹 Acrylic nail primer
🔹 Acrylic nail dehydrator
🔹 Acrylic liquid monomer ( Try avoiding MMA or Methyl methacrylate. This element can harm your nails. Instead, go for the EMA or Ethyl Methacrylate)
🔹 Acrylic nail powder
🔹 Acrylic brush
🔹 Acrylic bowl
🔹 Cuticle pusher
🔹 Cuticle oil
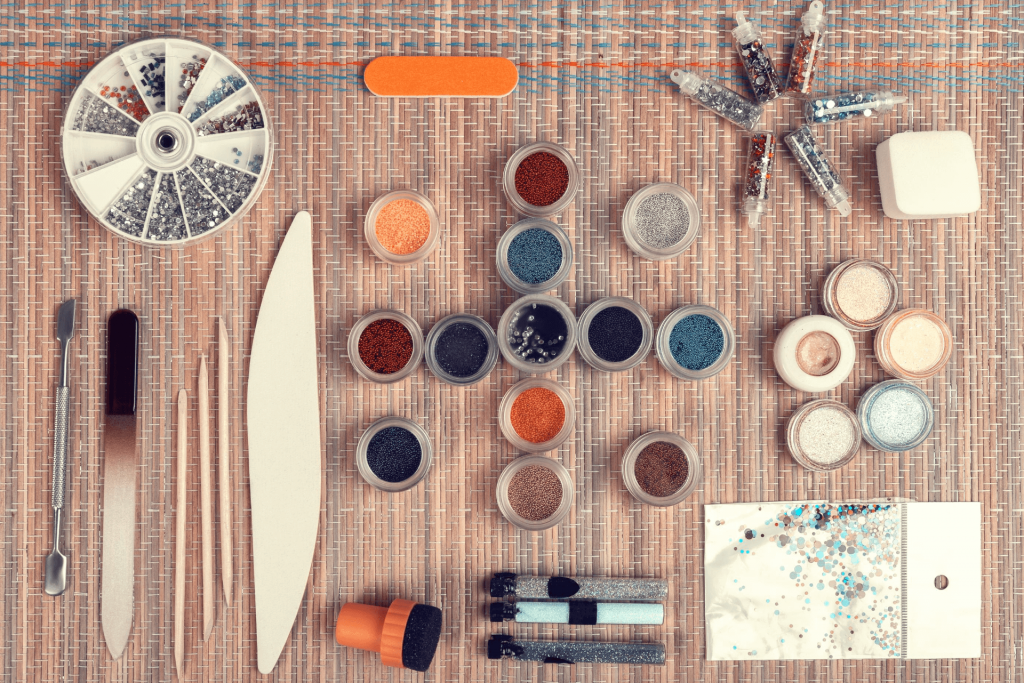
With the separate supplies, you can control the appearance of your acrylic nails. If you are facing trouble finding these items, buy a full acrylic nail kit set. These package tools are available both online and offline.
One more thing, never buy cheap materials for your acrylic nails. These can harm your nails and skin. Always go for the branded ones.
How to Make Homemade Acrylic Nails
For your convenience, I have divided the whole polishing process into some steps. Follow them properly, and I hope you will get your desired acrylic nails.
Step 1: Wipe off the old polish
It is not only with acrylic nails, no matter which manicures you want, prepare your nails for it first. The manicure will be most effective if you can start with a blank nail.
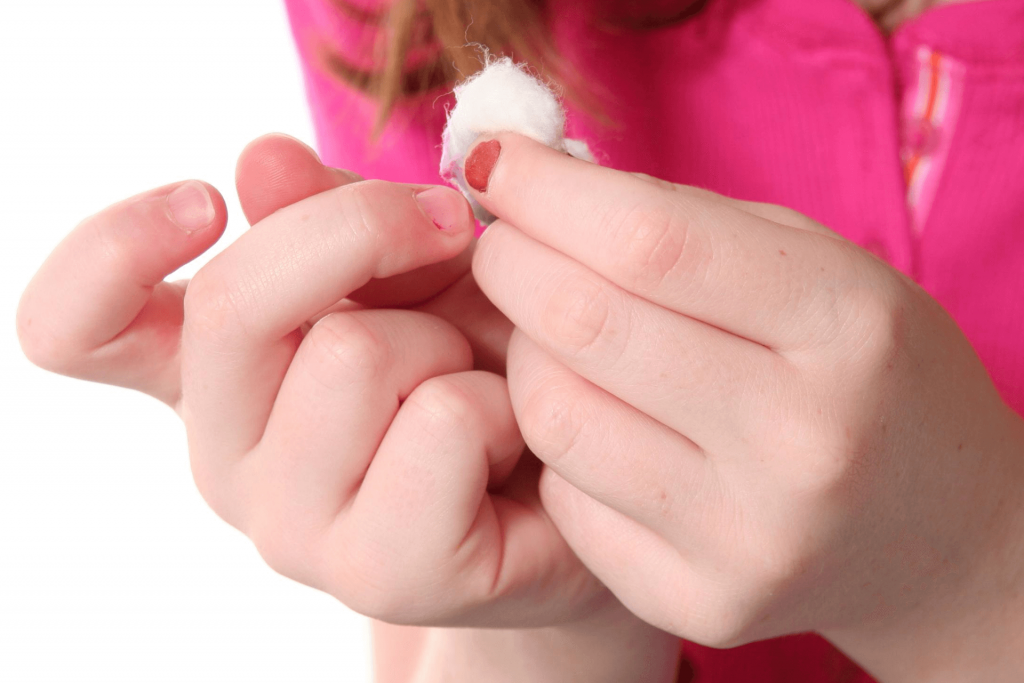
The best way to remove the previous nail polish is to use acetone based, oil-free nail polish remover. Take cotton pads and soak them with the acetone. Then wipe off the manicure from each nail.
You can follow some other methods for this step:
✔ Acetone soaking method
✔ Aluminum wrapping
✔ Baggy method
It does not matter which one you are following, make sure there are no leftovers on the nail surface.
Step 2: Shape your nails
It is very important to shape your nails, you can start with trimming the nails with a nail clipper or trimmer. Cut your nails to your desired length. This will work as a good base for the acrylic paste. If you want acrylic nails with tips, spare a few millimeters at the top.
After the trimming session, start buffing your nail surface and top. With the buffer block, you can give the nails your desired shapes. Also, the soft surface is not ideal for acrylic paints. You need to make them less shiny and rough.
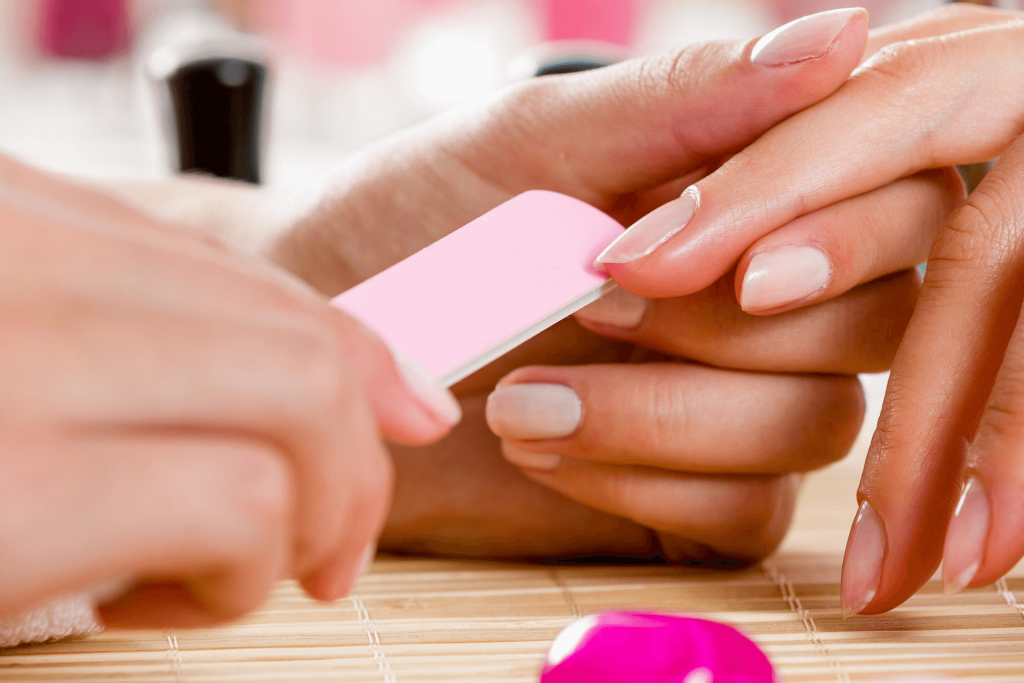
Now, focus on your cuticles. Make sure your cuticles have not adhered to your skins but the natural nails. Push back your cuticles with a wooden cuticle pusher, or you can trim them.
Many people use metal pusher, which is not appreciable. If you do not have any cuticle pusher, make yourself one with the wooden popsicle sticks. Pushing or trimming cuticles is easier if they are wet and soft. So, soak your fingers with warm water for a few moments before applying this step.
Step 3: Dehydrate your nails with a primer
I have mentioned above that rough surfaces are best for acrylic nails. To remove oils and the remaining hydration from your nails, use an acrylic nail primer. You can apply either acetone-based or acid-free primer. Using too much primer can harm your nails and skin.
Step 4: How to do acrylic nails with tips
Some girls face trouble finding the right sized tips for them. Here is a life hack. You can file down any tip and make it perfect for your nails.
Apply a small amount of glue at the bottom of the tip. Then place it carefully on your natural nails and hold for 20 seconds. Once the tips stick to the nails, cut them at your desired size.
Step 5: Prepare the acrylic paste
Before rolling more deeply into how to do your own acrylic nails, let’s learn how to prepare the acrylic paste first.
Start with collecting the acrylic powder and liquid. Take two acrylic bowls. Pour the acrylic liquid in one bowl and put the powder in another one.
Take your acrylic brush and dip it into the liquid bowl. To remove any excessive monomer, push it against the edge of the bowl. After that, run the brush through the acrylic powder bowl.
Soon, you will get a small moist ball of acrylics. Maintaining the density of this ball is very important. It may take you some practice to make the perfect acrylic ball.
Step 6: Apply the acrylic balls
Now it is time to apply the acrylic polish on your nails. Take a ball and flatten it on your nail surface. Spread the paste evenly and smoothly using a brush. Make sure there is no graph between the polish.
Use as many acrylic balls you need. To get the best output and avoid lumps, try using small strokes in a similar direction. However, make sure your cuticles do not get any bit of acrylics.
Step 7: Dry the nails
You are almost done with your acrylic nails. Let the wet paste dry for 10 minutes. Depending on your material selection, it may take a bit longer to cure the manicure.
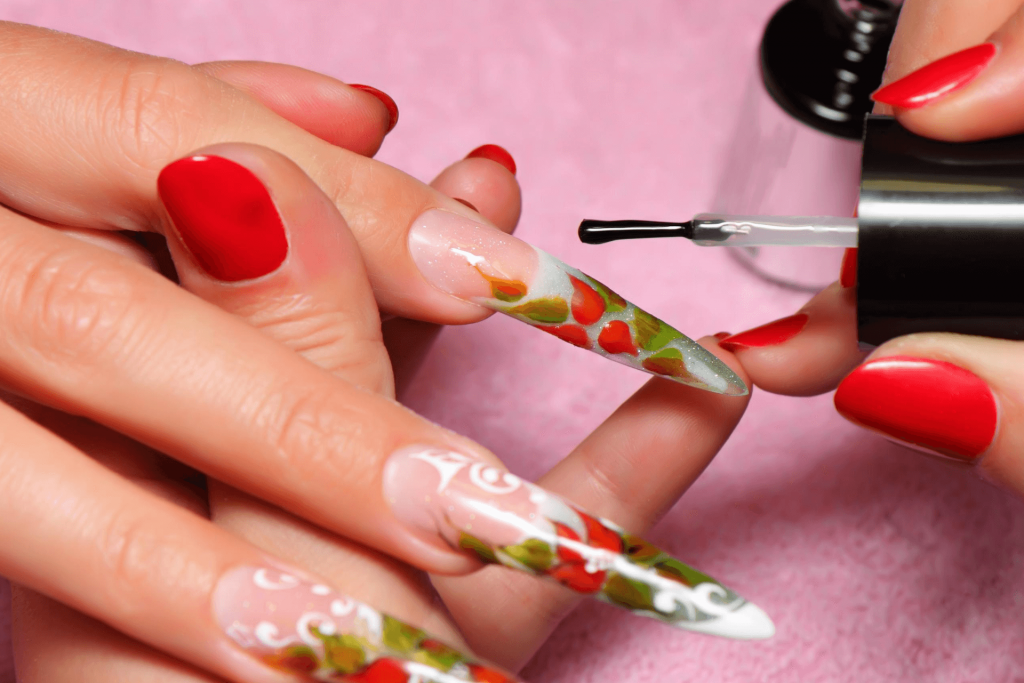
Step 8: Give a finishing touch
Once your polish cured, file them and paint your desired acrylic nail designs. You will find thousands of nail art ideas online.
Related: How Much Are Acrylic Nails? – Quality Depends On The Price
Doing the acrylic nails perfectly can take a few practices. I hope with this tutorial on how to do your own acrylic nails, your manicure experience will be a lot easier.


