


Are you a big fan of acrylics nails and want to do them by yourself? To be honest, this nail enhancement method is not as easy as it seems to be. When you watch your nail technician doing it, the task looks like a cup of tea. But wait, do not lose your hopes. With proper guidelines, you can master the technique too.
In this article, you will get the step by step guideline on how to do acrylics nails at home. However, doing acrylics manicure at home can save you a big sack of money. Also, it gives you the freedom to change your polish whenever or however you want it
Related : How To Do Dip Nails at Home: A Complete Manicure Guide
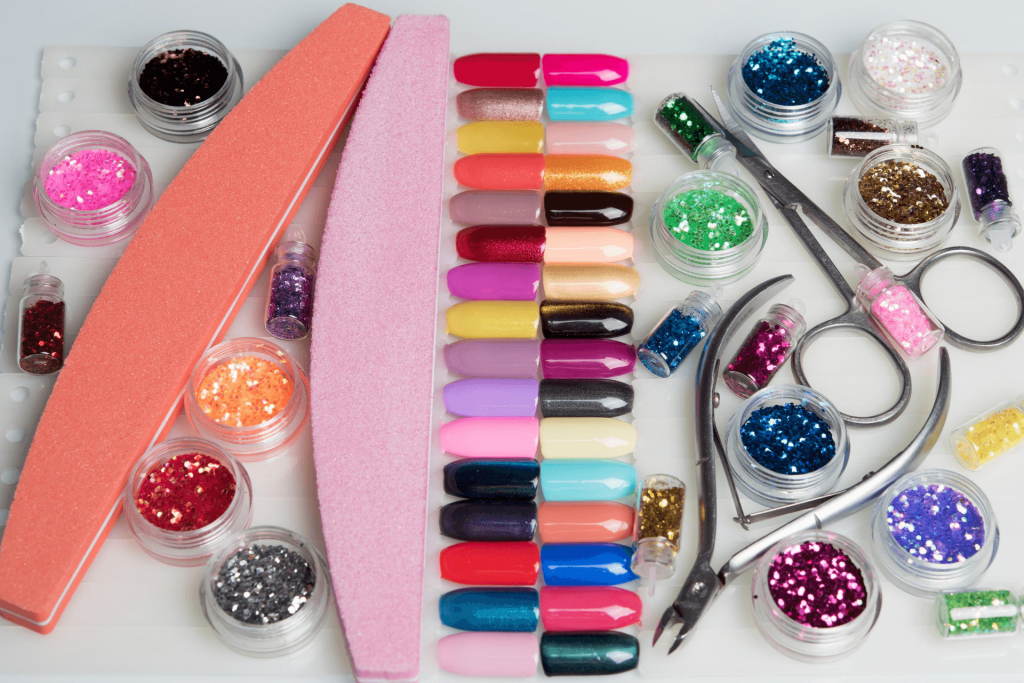
Acrylics Nails At Home Kit
You can do acrylics nails by following different methods. No matter which one you follow, you will need some products. Here is a list of supplies that you may consider:
🔸 Nail clippers
🔸 Nail filer
🔸 Buffer block
🔸 Acrylics nail tips
🔸 Acrylic nail prep or dehydrator
🔸 Acid-free nail primer
🔸 Acrylic powder
🔸 Acrylic nail brush
🔸 Acrylic liquid
🔸 Nail glue
🔸 Topcoat
🔸 Base coal
🔸 Acrylic bowl
🔸 100% acetone
🔸 Cuticle oil
🔸 Pinching tool
🔸 Manicure brush
Depending on your methods, you may have to add or remove any acrylic nails kit from the list. You can buy a commercial acrylic nail kit. Those packages are available both online and offline.
How to do acrylics nails
Follow the detailed step by step discussion below to do acrylics nails professionally.
Step 1:
First of all, prepare your nails for the acrylics nails. If you want your manicure to be more efficient, start with a blank nail surface. It means to remove any leftover nail polishes from your previous manicure.
You can remove your old nail polish with many techniques. The easiest one is to soak your fingernails in acetone. Take a large bowl and fill 1/2 of it with pure acetone. Soak your nails in that until the polish comes off.
To wipe off the residue, use the acetone soaked cotton pads. Never try peeling off the previous nail paint. It can damage your nails and make it a lot thinner.
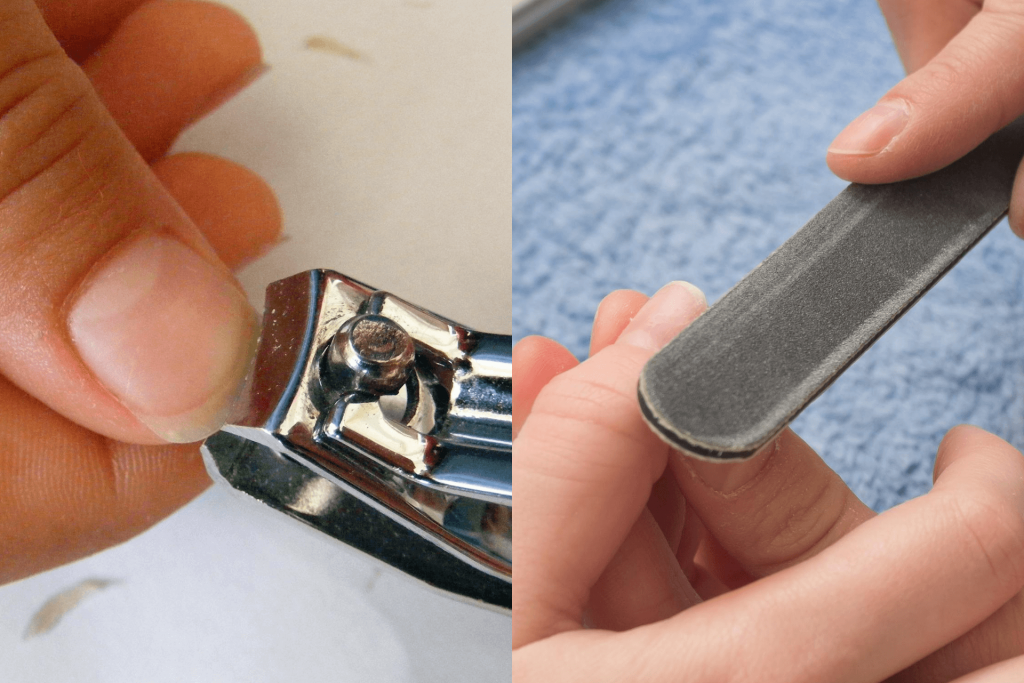
Step 2 :
Once you are done with removing the old nail polish, trim your nails with a nail clipper. Cutting your nails at an even, short and manageable length works as a good base for the acrylic nails. Spare a few millimeters from the top if you want acrylic nails with tips. Finally, file the nails to even them out.
Step 3:
Buffing the soft surface of the nails with a buffer block makes them less shiny and rougher. This provides the acrylic paints with a better base to stick to. So, buff your nails with the buffer block.
Step 4:
You obviously do not want your acrylic paints to stick to your skin. So, push back your cuticles using a cuticle pusher or your hand. Trimming your cuticles can also be an option.
Beauty experts always prefer using wooden cuticle pusher instead of the metal one. The wooden pusher is better for fingernails. Also, if you do not have any pusher, use a popsicle to do the job.
Pushing back the dry cuticles can hurt your fingers. I recommend you wet your fingers in warm water before trimming your cuticles. If you want the nails to look extra fine, work on your cuticle a few days before.
Step 5:
If you are looking for how to do acrylic nails with tips, then this step is for you. If not, then skip this part.
First of all, select the nail tips that will fit your nail snugly. Stick those tips to your nail beds using a small amount of nail glue. Hold the tips with a little pressure for about 10 seconds or until you feel the tips are stuck to your nails.
After that, cut the nails to your desired shape. You can use a filer to shape your nails. Most people face a problem that the tips do not match with the nails naturally. If you feel a ridge, you can buff the tips joint with a buffing block. Then wipe off the joint with an acetone soaked cotton ball.
Make sure there is no remaining dust due to filling. To give the nails a white finish, apply nail dehydrator to the entire nail surface.
Step 6:
For the best adhesion of acrylic nails, you have to make sure your nails are oil-free and rough. The easiest way to do that is to apply an acid-free nail primer to your nails.
Step 7:
Now it is time to get ready the acrylic materials. Take two acrylic bowls. Pour acrylic nail powder in one dish and the acrylic liquid in another one. The acrylic is a strong chemical, and the reactions can create toxic fume. So, make sure your room is well ventilated.
Step 8:
Take the acrylic brush and dip into the liquid. To remove the excess liquid off the brush, swipe it at the edge of the bowl. Put the brush into the powder bowl. Run it through the powder until you get a tiny ball of acrylics. The ball should not be too wet or too dry.
Step 9:
Put the ball on the nail bed and flatten it using the brush. Spread the mixture all over your nail surface evenly and smoothly. You can apply more than one ball if you need it. Make sure the strokes are perfect, and there is no gap between the paints.
I suggest taking one stroke at a time to avoid the lumps. However, ensure that there are no acrylics on your cuticles.
Step 10:
You are almost done. Dry the acrylic nails for 10 minutes. Depending on the layers, you may need more time to cure the polish.
Step 11:
Once your acrylic nails are set, use a coarse filer to shape your nails and tips. To give the surface a smooth finishing, use a buffer afterward. You can also use a color coating on the top of your acrylic nails.
Related : How To Dry Makeup Brushes Fast – All The Tricks You Should Know
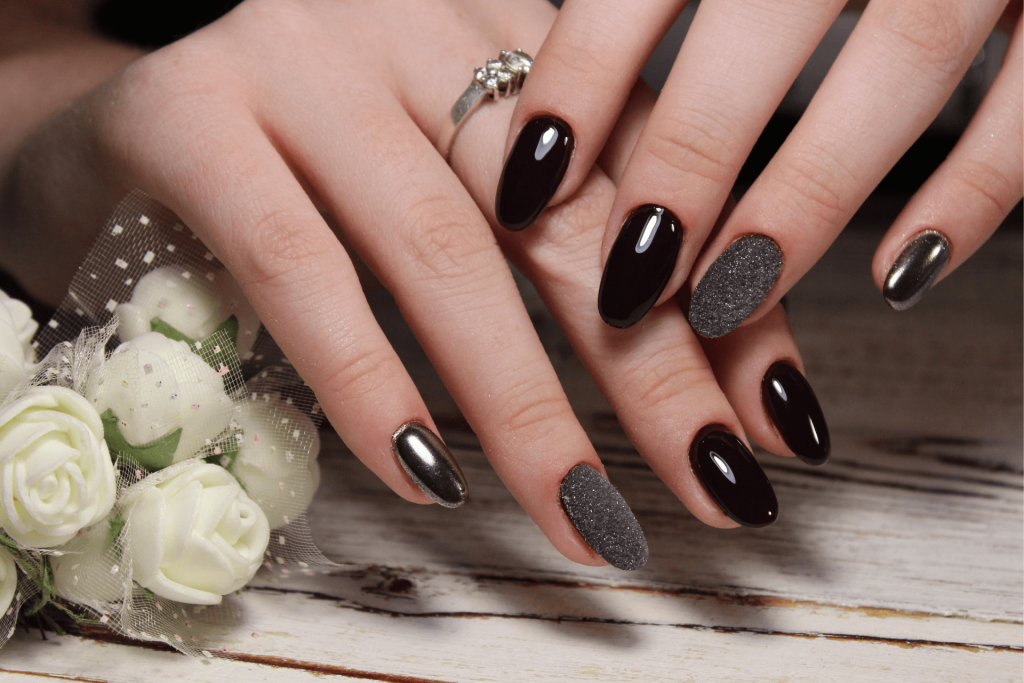
Doing acrylic nails design perfectly will take both patience and practice. I hope with this tutorial on how to do acrylic nails, you can master the manicure more easily.


